I’ve recently started to use the Fieldbook API to send transactional emails to users of an app I’m writing (Maproom for those who want to know). Even though I’m not at all an expert with transactional email it wasn’t too hard to set up. And using Fieldbook to send emails is very satisfying. I’ll show what I’ve learned in three examples which cover an inventory and order system on Fieldbook.
What you need
To follow along, you’ll need a Fieldbook account and API access and you need an account with a service sending the actual emails. I use mailgun for this. While you’re at it, it’s also a good idea to pull up the documentation for nodemailer. Nodemailer is the javascript module I’ll use to talk to mailgun. This article is mainly aimed at developers working (or wanting to work) with Fieldbook.
Codelets
One of the best features of Fieldbook, at least for me as a developer, are the Codelets. Codelets are bits of javascript code run on Fieldbook. They can talk to your data on Fieldbook but also do stuff totally unrelated. They’re a super easy way to set up your own APIs for all sorts of purposes. Here I’ll use codelets to send emails. What’s nice is that these codelets come preinstalled with a long list of javascript modules ready to use. That makes these codelets even more powerful.
Mailgun
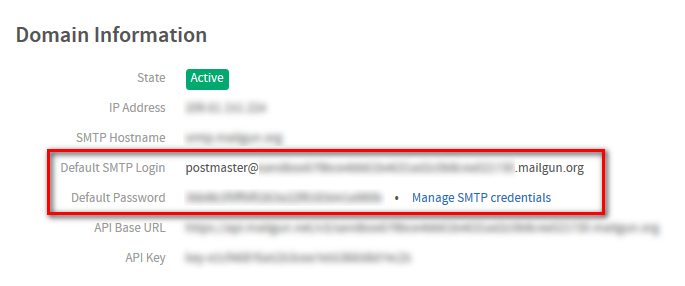
First let’s create a new account with Mailgun. Mailgun gives away the first 10.000 emails a month for free which is more than enough for my purpose. To actually use Mailgun in production you need to add a domain and modify a few DNS records with the hosting company. While that sounded quite intimidating to me, it was pretty easy to do. Mailgun then needs to verify your domain and you’re ready to go. But, for testing purposes you can use a sandbox domain as long as you use a verified email address as the recipient. From the sandbox domain settings you’ll need the Default SMTP Login and Default Password.
Nodemailer
I’ll use nodemailer to talk to mailgun although you could also talk to their API directly. Nodemailer does it in three steps. First you provide the mailgun credentials. Then you create the actual message together with the to and from addresses. Finally you send the email on its way. Nodemailer allows you to provide detailed smtp settings but it has a few presets for common email services like mailgun. The setup really is a breeze.
Example 1
Let’s create a codelet on Fieldbook and use it to send a simple email message. Create a new book, go to the API and create a new Codelet. I’ll call it “Example1”.
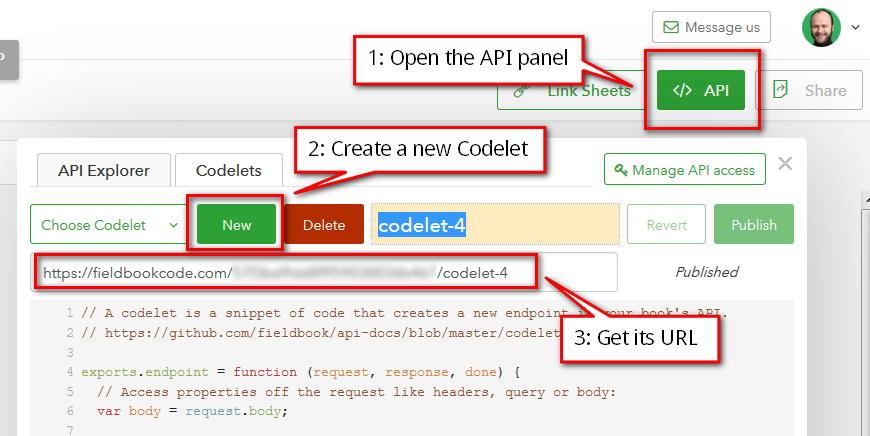
The new codelet will include a bit of boilerplate code but we can get rid of that. Replace the code with this:
var nodemailer = require('nodemailer');
exports.endpoint = function () {
  var transporter = MakeTransport();
  var message = {
    from: 'mail@preview.klaasnienhuis.nl',
    to: 'mail@preview.klaasnienhuis.nl', // should be an authorized address when using the mailgun sandbox
    subject: 'Your order status',
    text: ('Hi there,\r\nYour order has been received')
  };
  transporter.sendMail(message);
  return {return:"okay"}; //it's a good idea to return something
};

function MakeTransport(){
    var smtpConfig = {
    service: 'Mailgun',
    auth: {
      user: 'postmaster@mg.3dsmaproom.com',
      pass: 'myObviouslyFakePassword'
    }
  };
  return nodemailer.createTransport(smtpConfig);
}
At the top you see we add the nodemailer module. The exports.endpoint = function () {}; is expected by Fieldbook. It encapsulates our code. I’ve also added a separate function to setup the communication to mailgun. Within this endpoint I call that function, create the email message and finally I send the message. At the end I return an object. You can also return a promise or invoke the done() callback. Make sure to return something, Fieldbook will like you for it. When creating the codelet you’ll see it has a unique URL. In this example you can GET the URL to trigger the codelet into sending the email.
curl -X GET "TheCodeletUrl"
This sends me this email message
Hi there,
Your order has been received
Example 2
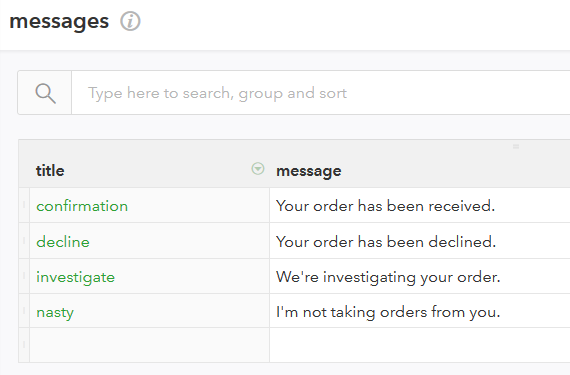
In this second example I’ll expand a bit on the previous one and use data from the request and data from a Fieldbook sheet. I want to get the actual message body from a sheet I’ve set up. This sheet contains a title column and a message column.
var nodemailer = require('nodemailer');
var Q = require('q');
exports.endpoint = Q.async(function * (request) {
  var transporter = MakeTransport();
  var theMessage = (yield client.list('messages', {title: request.body.title}))[0].message;
  var message = {
    from: 'mail@preview.klaasnienhuis.nl',
    to: request.body.email, // should be authorized when using the mailgun sandbox
    subject: 'Your order status',
    text: ('Hi ' + request.body.name + ',\r\n' + theMessage)
  };
  transporter.sendMail(message);
  return {return:"okay"}; //it's a good idea to return something
});

function MakeTransport(){
    var smtpConfig = {
    service: 'Mailgun',
    auth: {
      user: 'postmaster@mg.3dsmaproom.com',
      pass: 'myObviouslyFakePassword'
    }
  };
  return nodemailer.createTransport(smtpConfig);
}
I’m now adding the Q module to help with the async stuff. Also added is the request parameter to the endpoint. This enables me to actually post data to the codelet. Data we can use to shape the email. The beginning is the same: configure the mailgun smtp. I then search for a message body by title in my sheet and then get the actual message content. Then I compose the message with data from the request such as the recipients email, recipients name and the message text I’ve just found from the book.
To trigger this codelet into sending an email I need to POST a bit of JSON. The title can be any of the titles from the book, for instance.
{
  "email": "mail@preview.klaasnienhuis.nl",
  "name": "Klaas",
  "title": "nasty"
}
Let’s curl this
curl -X POST -H "Content-Type: application/javascripton"
-d '{"email": "mail@preview.klaasnienhuis.nl","name": "Klaas", "title": "nasty"}' "TheCodeletUrl"
This gets me this email
Hi Klaas,
I’m not taking orders from you.
Example 3
In this final example I’m using all that I’ve learned and add a webhook and Fieldbook form. This gives me a system where I can keep track of an inventory and send transactional emails when an order comes in through a form.
The sheets
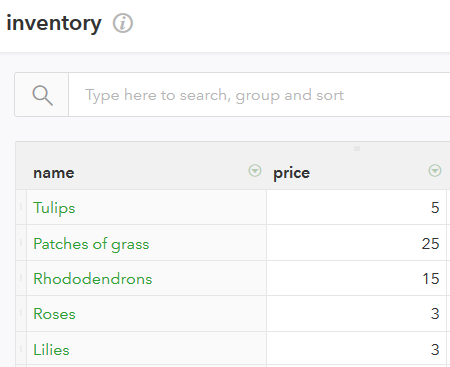
First create a sheet called inventory. Add two columns: name and price and add some data. Then add a sheet called orders with four columns: email, name, product and amount. Link the product column to the inventory sheet. This allows you to pick from a list of products. The type of the email column is set to email. This is important as this makes sure users are forced to enter a valid email address here when they use the form. The first column is set to Numeric ID. Also set all columns of the orders sheet to “Required”. Then add a form for this sheet. This form can be published outside of Fieldbook and allows users to just enter orders and not deal with Fieldbook in any other way.

The webhook
Now I add a new codelet but I leave it empty for now. I only need the codelet URL initially. Next up is the webhook. I’ll have this webhook call the codelet I just made every time a new record is made. I especially am interested in new orders although the webhook also fires when new inventory is added. But I just ignore those new records. To create the webhook I need to get a key and password for the API on this book first. Go to “Manage API Access” and generate a new key. Then create the webhook, I use Postman to do this. I only listen to the “create” action. To summarize: this webhook can trigger my codelet to send an email each time a new order is placed: transactional email!
curl -X POST -H "Content-Type: application/json"-u $KEY:$SECRET
 -d '{"url": "TheCodeletUrl", "actions": ["create"]}'
"https://api.fieldbook.com/v1/Base_API_id/meta/webhooks"
The codelet
Now that the webhook is set up, I can fill in the codelet. I want to send out an email with the details of the order once it comes in. The webhook passes the newly created order to the codelet, which is very convenient. This means I can send an email every time someone places an order. I also get the price of the ordered item and use that to calculate the total amount. This makes for a complete email message. Keep in mind if you’re using the mailgun sandbox, you can only send emails to verified addresses.
var Q = require('q');
var nodemailer = require('nodemailer');
exports.endpoint = Q.async(function * (request) {
  var transporter = MakeTransport();
  var newOrders = request.body.changes.orders.create
  var order
  for (order of newOrders){
    var theOrderedItem = (yield client.list('inventory', {name: order.product}))[0]
    var message = {
      from: 'mail@preview.klaasnienhuis.nl',
      to: order.email, // should be authorized when using the mailgun sandbox
      subject: 'You\'ve ordered flowers',
      text: ('Hi ' + order.name + ',\r\nYour order of ' + order.amount + ' ' + order.product + ' has been placed.\nThe total amount is $' + (order.amount * theOrderedItem.price))
    };
    transporter.sendMail(message);
  }
  return {return:"okay"}; //it's a good idea to return something
});

function MakeTransport(){
    var smtpConfig = {
    service: 'Mailgun',
    auth: {
      user: 'postmaster@mg.3dsmaproom.com',
      pass: 'myObviouslyFakePassword'
    }
  };
  return nodemailer.createTransport(smtpConfig);
}
Here I send an order for 7 Lilies
curl -X POST -H "Content-Type: application/javascripton" -u $KEY:$SECRET
-d '{"email": "mail@preview.klaasnienhuis.nl","name": "Klaas","product": "Lilies","amount": 7}'
"https://api.fieldbook.com/v1/Base_API_id/orders"
And here I send the same order through the form
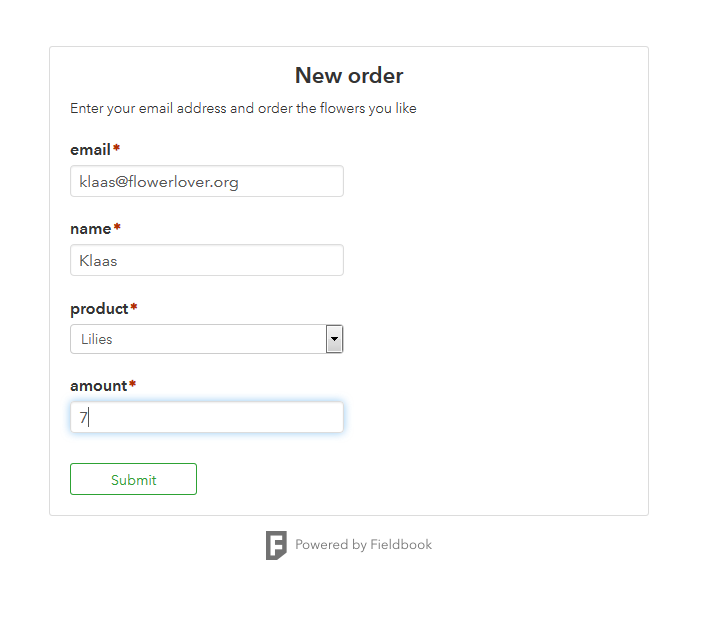
This should result in an email message
Hi Klaas,
Your order of 7 Lilies has been placed.
The total amount is $21
Conclusion
Fieldbook enables me to set up a very nimble transactional email system for all kinds of actions and link that to Fieldbook sheets through their API. The Codelts in Fieldbook are an incredibly powerful way to speed up API development.
Thanks to Jason Crawford from Fieldbook for encouraging me to write this and for fact-checking.
Email image by Lorena Salagre from the Noun Project

